Deploying Docker Containers on Mac OS X using Kubernetes (K8s) - C# ASP.Net MVC Core

Uniform Testing Through Containerisation
Looking to test your software in multiple environments? Perhaps you’ve been in a situation where code changes you’ve deployed to staging don’t work in production, despite he code base being exactly the same?…Well, a container is used to package up your application into a…"container", in order to allow each package to be tested across numerous environments in a uniform manner.
“A container is a standard unit of software that packages up code and all its dependencies so the application runs quickly and reliably from one computing environment to another.”
There are many benefits to using containers, particularly when it comes to the DevOps lifecycle and of course, testing!! On many occasions we’ve all sat there waiting for that virtual machine to bounce back so the increasing throughput can be handled, and it can feel like you’re waiting forever. Containers are much better equipped for the zero downtime aspect due to the speed at which you can stop and start them. The most attractive thing that I find about containers is the ability to allow uniform testing to take place between staging vs. production environments, and all because the container itself shares the machine’s operating system kernel…A fantastic way to test that changes running on localhost also work…in production…

“I Run Virtual Machines Already…”
…That’s certainly not a bad setup, but let’s cover a few differences between containers and VM’s for a minute. Yes, they have similar resource isolation and allocation benefits, but containers are much more portable and efficient than virtual machine’s because they don’t virtualize the hardware, they virtualize the operating system instead. A virtual machine abstracts the physical hardware, and thus one server becomes many servers because the Hypervisor allows you to run many VM’s on one machine…except each VM runs a full installation of the operating system…
Abstract Hardware vs. Abstract Operating System
…Container’s don’t abstract the hardware, they abstract the application layer including the dependencies. They also use virtual memory to maintain the isolation. Given this, you can indeed run multiple containers on the same machine, each as an isolated process which shares the OS kernel…and they take up much less space than VM’s, have a much lower overhead and are way quicker to boot up! So essentially, a container allows you to package up your entire application, including all of it’s dependencies, and run it as a complete package which you can stop and start as needed!
To some extent, the legacy method of isolating each part of your platform was to only* use hypervisor…
Enter “Docker”…
Docker is a fantastic implementation which allows operating system virtualization to occur. Docker specifically allows packages of software to run in what it defines as “containers”.
“Build, Ship, and Run Any App, Anywhere.”

C# ASP.Net MVC Core, Docker, Kubernetes (K8s)
Perhaps your system involves ten different microservices, the increasingly popular architectural pattern for producing large scalable platforms - Docker allows you to encapsulate those microservices and manage the containers in a quick and scalable manner.
Containers are there to provide reliable (and easy) deployment, ideally using as little memory as possible, particularly since the size of the produced image file can affect the containers startup time, and in today’s world…speed is everything. Fundamentally, we are talking about containerisation, as an alternative to virtualisation.
Docker Prerequisites
- Sign up to Docker Hub.
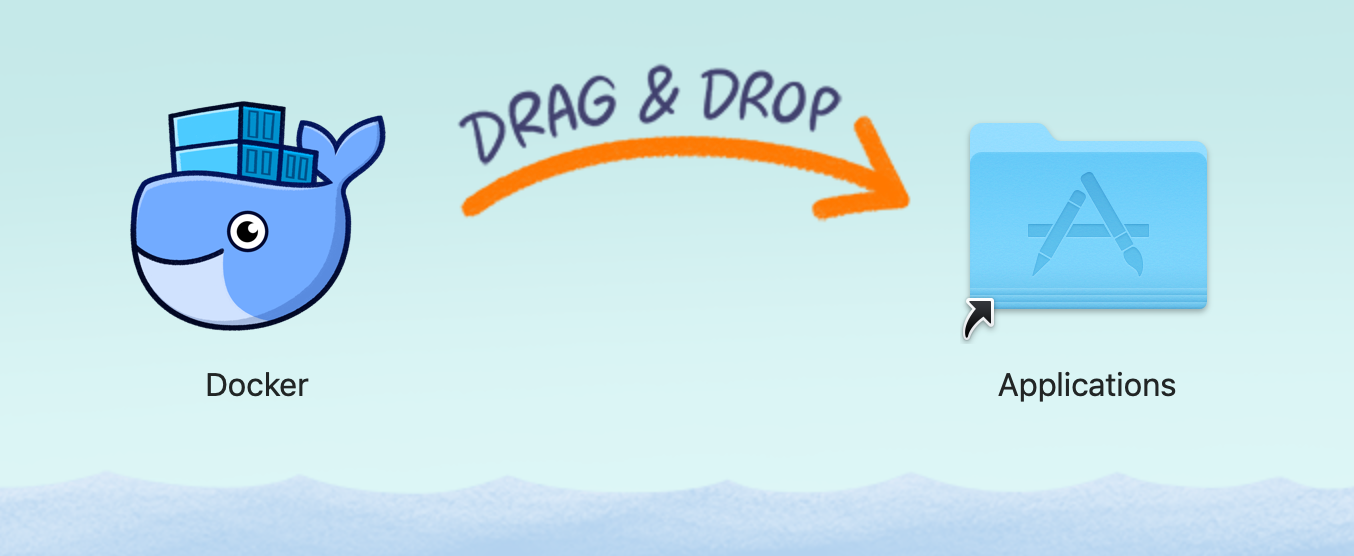
- Now install Docker on your Mac.
- Log in to Docker Hub.
C# ASP.Net MVC Core, Docker, Kubernetes (K8s)
Docker Process Flow
Docker is based on configuration (command line) statements that run from a specific text file called a Dockerfile. The Docker process flow is as follows -
- Create a Dockerfile (traditionally in the root of the context, but you can place it anywhere in your file system and point to it using a path).
- Docker Daemon performs preliminary validation of the Dockerfile and produces any necessary errors if the syntax is incorrect.
- Execute Docker build.
- Docker Daemon runs each config instruction independently and caches images for each instruction if necessary, which can be re-used thus accelerating the build process significantly.
- Docker Daemon produces a final image output of your application package.
Let’s Code…
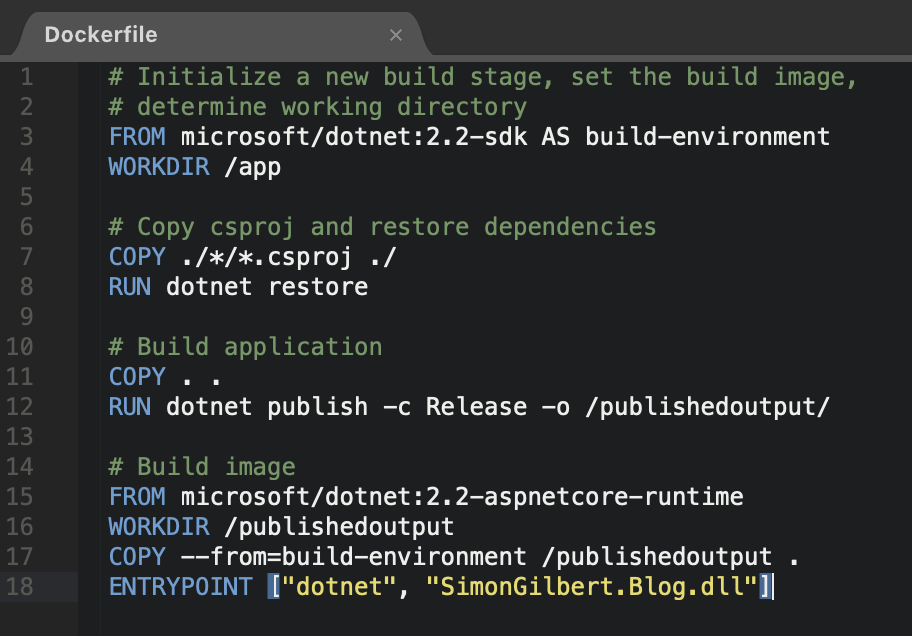
Our Dockerfile will look as follows -
C# ASP.Net MVC Core, Docker, Kubernetes (K8s)
So what have we done exactly?
- Every Dockerfile starts with the FROM command to initialize a new build stage.
- We then determine our working directory, which is where everything will be stored inside our image.
- Next we COPY the necessary local files to the current working directory of the image.
- We then restore all of our dependencies with the RUN command (and this specifically runs inside our image).
- We then publish our application to the /publishedoutput folder inside our image.
- Finally we execute the ENTRYPOINT command to spin up a container and run as an executable.
Ok, let’s execute our Dockerfile. First, you’ll need to navigate to the root of your source code where you Dockerfile is located.

C# ASP.Net MVC Core, Docker, Kubernetes (K8s)
Building Our Docker Image
Now to build our Docker image, whilst specifying an image name and a tag of “v1”, to indicate that it’s version one of our image. In this example our image name is constructed as [DOCKER HUB USERNAME/IMAGE NAME:VERSION TAG].

C# ASP.Net MVC Core, Docker, Kubernetes (K8s)
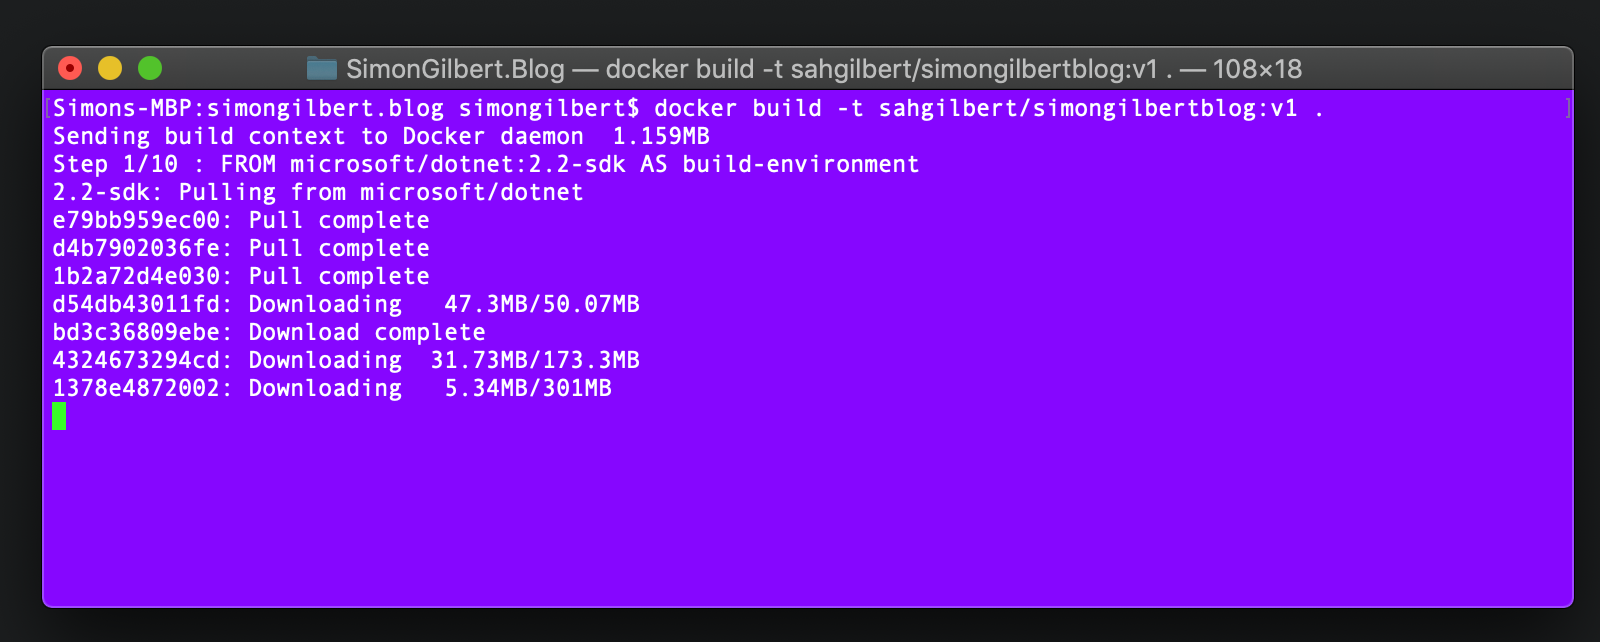
You will see Docker pulling down the .Net Core dependencies initially -
C# ASP.Net MVC Core, Docker, Kubernetes (K8s)
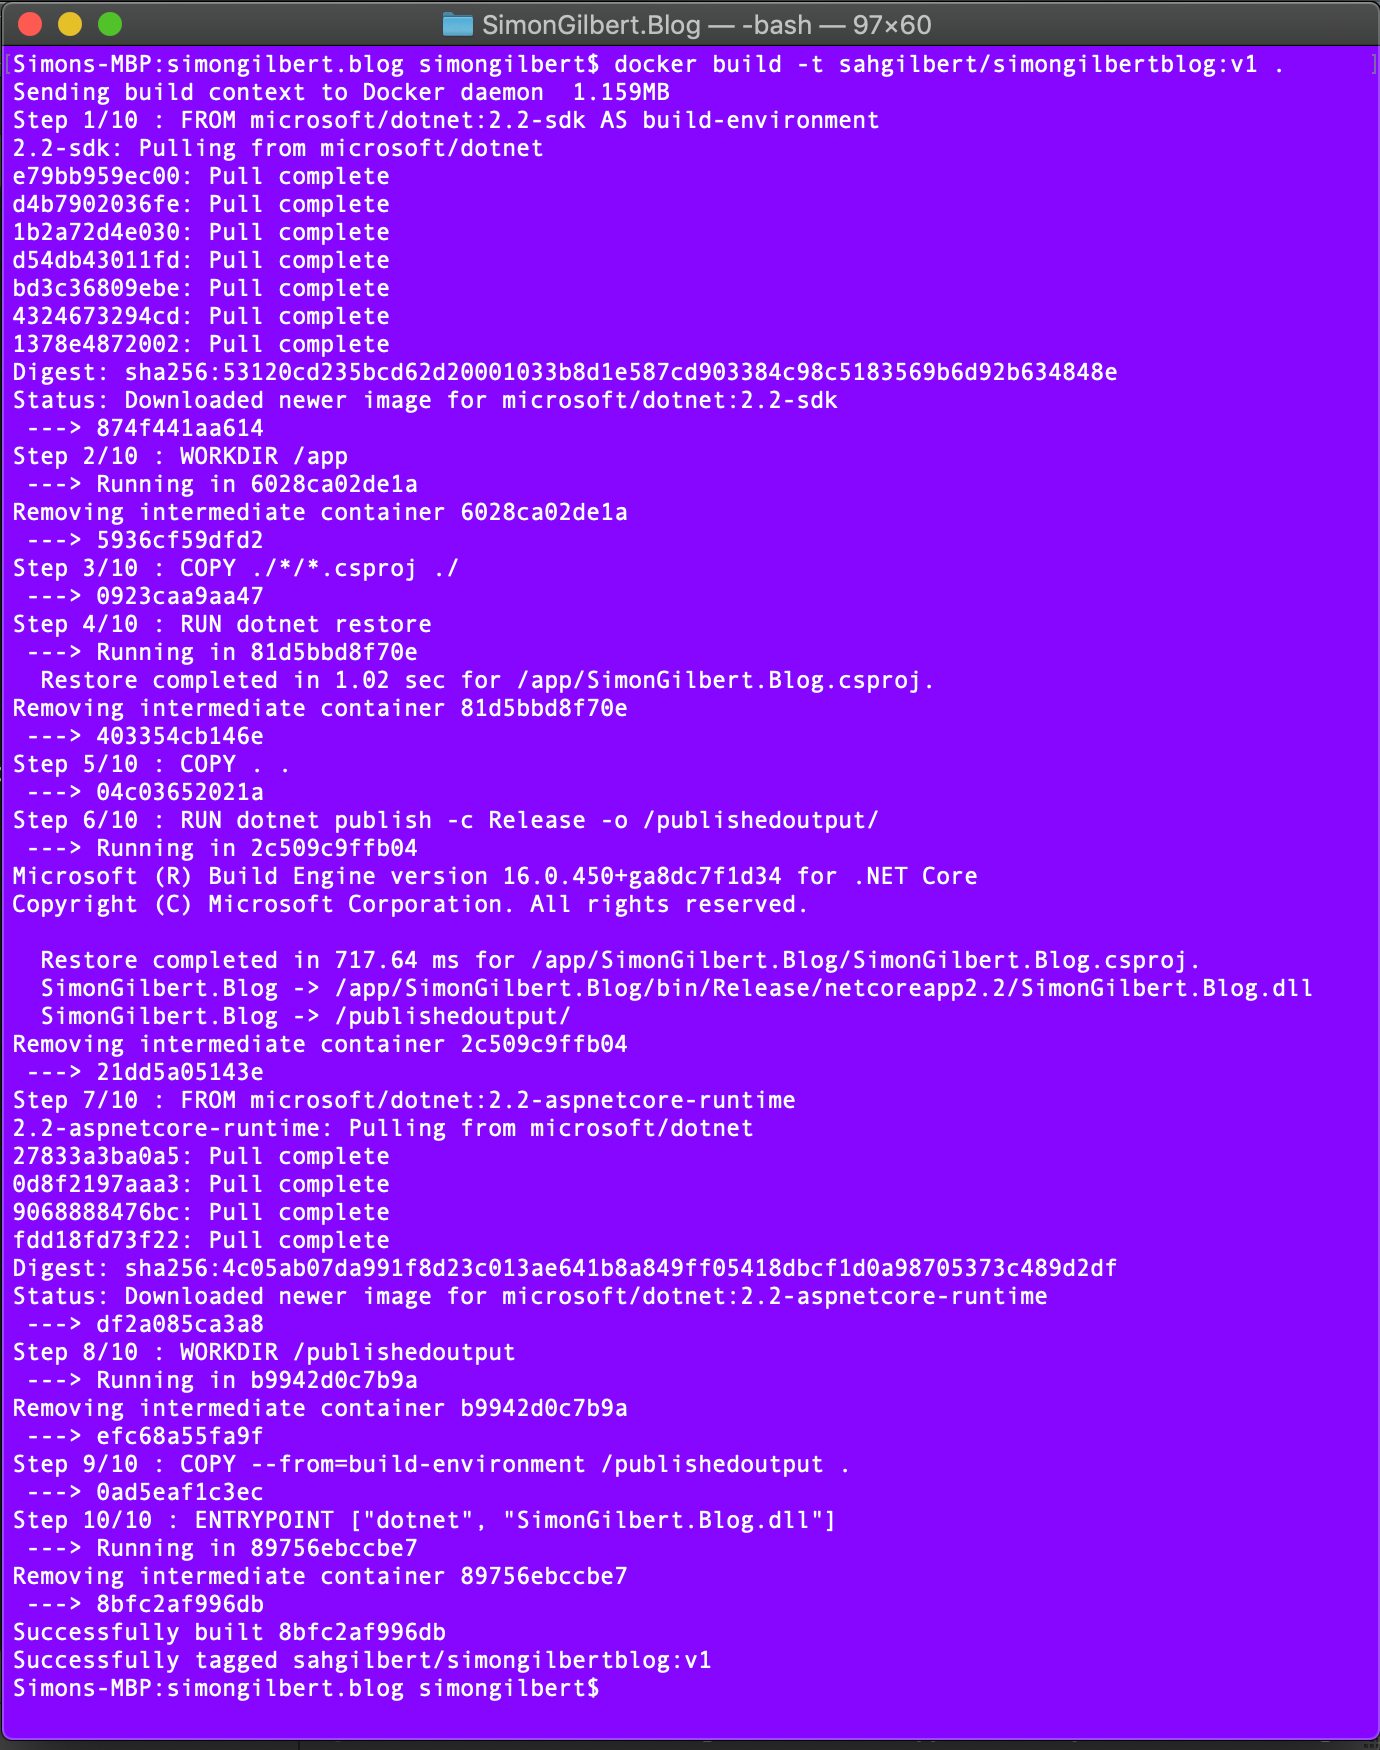
Your final output should then be similar to this, indicating that each step was executed successfully.
C# ASP.Net MVC Core, Docker, Kubernetes (K8s)
…all steps have complete successfully.
Viewing Our Docker Image
We can now view the image we created when we executed our Docker build statement. Note how our repository name is the same as the full image name we provided at the build execution stage.

C# ASP.Net MVC Core, Docker, Kubernetes (K8s)
Pushing Our Docker Image To Docker Hub
Before we push our image to Docker, it’s worth noting that you get 1 free private repository. This example assumes that you are publishing to a public Docker Hub Repository that you have already created, so make sure that you repository is public before pushing your built image…
Now we can push our Docker image to Dockers Hub, as we’ll need it later when executing Kubernetes deployments…

C# ASP.Net MVC Core, Docker, Kubernetes (K8s)
If we now navigate to the Docker Hub, we can see our image has been pushed to our repository.

C# ASP.Net MVC Core, Docker, Kubernetes (K8s)
Running Our Docker Image
The next step is to run our Docker image on a specific port (5000 in this case).
- –rm ensures that the container is automatically removed when it exits.
- -it instructs Docker to create a pseudoterminal (pseudo-TTY) - an interactive bash shell inside the container.
- -p publishes the containers port to the host.

C# ASP.Net MVC Core, Docker, Kubernetes (K8s)
We can see here that the Docker image is now running as a container.

C# ASP.Net MVC Core, Docker, Kubernetes (K8s)
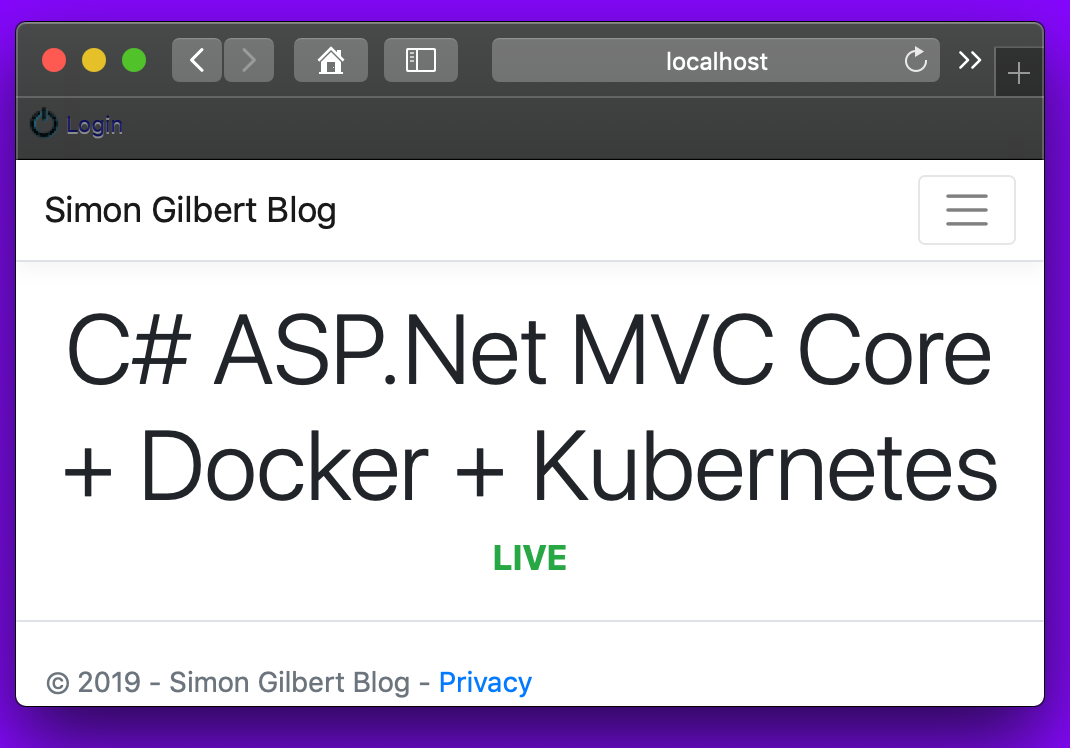
Now if we navigate to http://localhost:5000 in our browser we can see that our container is running.
C# ASP.Net MVC Core, Docker, Kubernetes (K8s)
We can also run our container in the background (using -d).

C# ASP.Net MVC Core, Docker, Kubernetes (K8s)
View All Running Docker Containers
In order to view our running Docker containers, we can execute the following command.

C# ASP.Net MVC Core, Docker, Kubernetes (K8s)
Managing and maintaining multiple containers isn’t easy…fortunately, there’s a tool for doing that…

C# ASP.Net MVC Core, Docker, Kubernetes (K8s)
Enter “Kubernetes” (K8s)…
Kubernetes (aka K8s) is an open-source container orchestration system, designed to allow automation of application deployment, scaling and management. Originally built by Google and heavily based on Google’s Borg system, but now managed by The Cloud Native Computing Foundation.
“Kubernetes defines a set of building blocks (“primitives”), which collectively provide mechanisms that deploy, maintain, and scale applications based on CPU, memory”
Kubernetes is made up of pods, services, volumes, namespaces and nodes. These are all resources that Kubernetes exerts its control over, in order to run them as objects.
Kubernetes (K8s) Pods
A Kubernetes Pod is a grouping of one or more containers. The containers within each Pod are guaranteed to be co-located on the same machine and can therefore share resources. For example, each container within the Pod is assigned its own unique “Pod IP Address” (in order to allow the use of ports without conflicts arising). A Pod has no way of directly addressing another container within another Pod. but a Pod can define a “volume” such as a local disk directory and expose it to the containers within the Pod itself.
Kubernetes (K8s) Services
So we’ve covered Kubernetes Pods and their definition of being a group of Containers, so now let’s discuss Kubernetes Services. You’re likely familiar with multi-tier (n-tier) architecture, and this directly aligns with Kubernetes Services. A K8s Service is a set of Pods that work together, affectively as one tier of an n-tier system. K8s Pods that work together as a K8s Service are assigned a label selector, and the service is by default exposed inside a cluster (but can also be exposed outside of a cluster).
Kubernetes (K8s) Volumes
Ephemeral storage is provided by default within a container, which is great, until you restart the container and lose everything…To circumvent this limiting aspect, K8s Volumes provide persistent storage which exists for the lifetime of the Pod. This is ideal for non-trivial applications…
Kubernetes (K8s) Namespaces
I mentioned earlier about the ability to separate out different environments for testing (staging vs. production). K8s Namespaces allow us to do this by partitioning the resources into individual sets called “namespaces”.
Kubernetes (K8s) Nodes
So we’ve got a series of Kubernetes Pods, but we need to run them on a specific machine. A Kubernetes Node is where our container Pods are deployed, alongside some additional components to help manage the Cluster Node itself. Given that a Container runs inside a Pod, the Container itself requires a runtime (typically Docker), to facilitate the running of the application package. Secondly is the Kube-proxy which is made up of a network proxy and a load balancer, specifically for routing traffic to the appropriate container based on IP Address and Port Number of the incoming request. Finally is the running state of each node, which is managed by Kubelet. Kubelet takes care of starting, stopping, and maintaining application Containers, and thus ensuring each node remains healthy! The state of each Pod is monitored by Kubelet, and if not in the desired state, the Pod re-deploys to the same Node. The Node status is relayed every few seconds via heartbeat messages, thus allowing this process to be maintained.
Kubernetes Prerequisites
- Install Kubectl first of all, as Minikube is dependent on it.
- Next install Minikube which allows you to run a single node Kubernetes cluster locally inside a VM.
- Finally install Oracle VirtualBox so you can run the VM.
Running Kubernetes
We’re now going to run Kubernetes locally via Minikube. Firstly, check your Minikube version to ensure you have the latest production release.

C# ASP.Net MVC Core, Docker, Kubernetes (K8s)
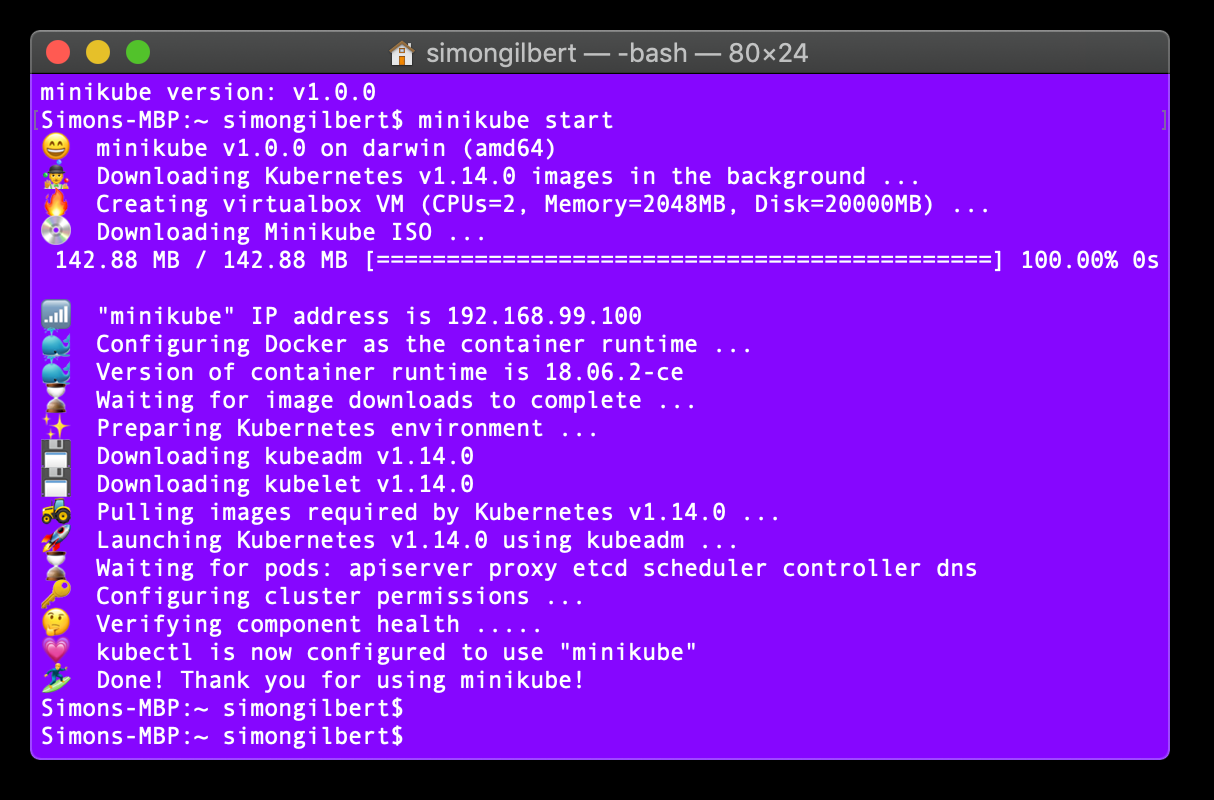
Now, let’s start Minikube - This can take some time the first time you run it, as it has to download an ISO file that’s fairly large, amongst other things such as booting up the virtual machine.
C# ASP.Net MVC Core, Docker, Kubernetes (K8s)
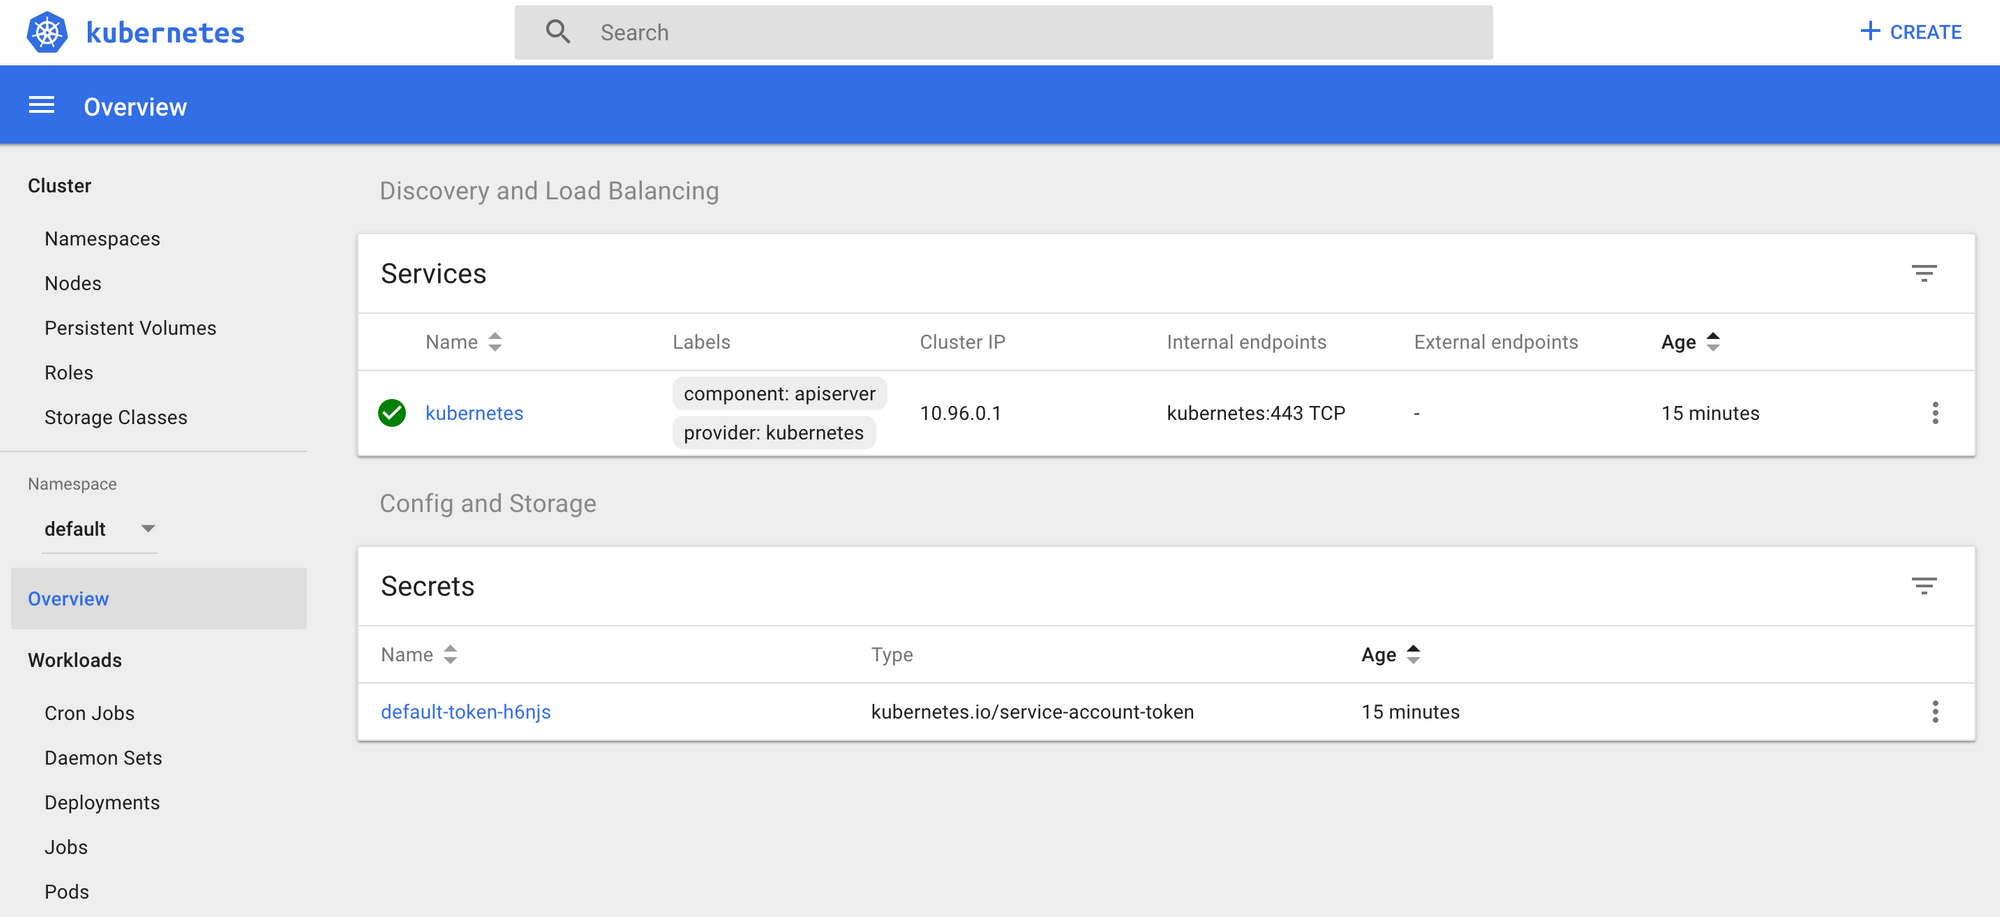
Now we can open the Minikube dashboard and view our local cluster.

C# ASP.Net MVC Core, Docker, Kubernetes (K8s)
You’ll see a new tab open in your browser at the point of executing this command, with the Minikube dashboard running.
C# ASP.Net MVC Core, Docker, Kubernetes (K8s)
Next let’s check to see if we have any deployments or pods running using Kubectl (which at this point, we wouldn’t expect to see).

C# ASP.Net MVC Core, Docker, Kubernetes (K8s)
…Excellent, now for a quick check to ensure that the Kubernetes cluster service is running, again using a Kubectl command.

C# ASP.Net MVC Core, Docker, Kubernetes (K8s)
Ok great, as expected. Finally let’s review the Kubernetes cluster info with another Kubectl command.

C# ASP.Net MVC Core, Docker, Kubernetes (K8s)
We’re now ready to start making use of Kubernetes which is running on our machine.
More Coding…
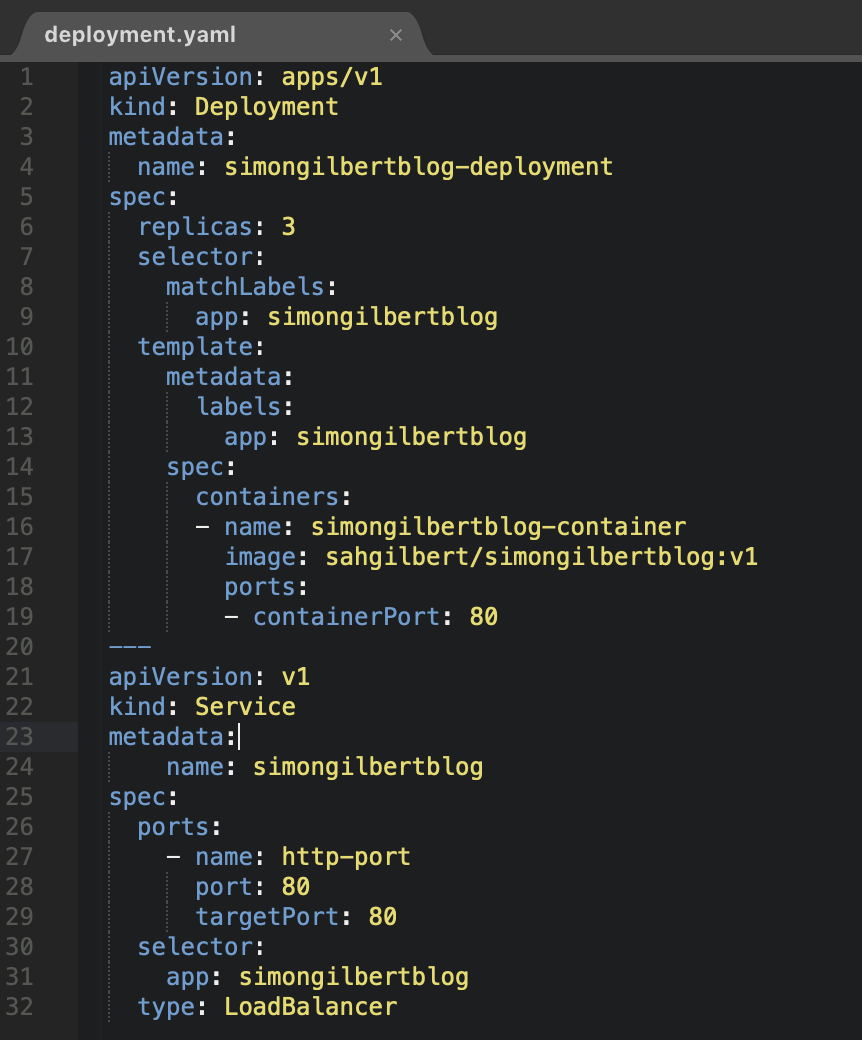
Now that Docker is installed and Kubernetes is up and running locally, we can begin to create our Kubernetes deployment.yaml file to deploy our Docker containers to our Kubernetes cluster.
Inside our deployment.yaml file, let’s begin by adding details about our Kubernetes Service as follows -
C# ASP.Net MVC Core, Docker, Kubernetes (K8s)
- apiVersion - The type of API version for our deployment object
- kind - The kind of object to be created.
- metadata - The meta data associated with the object. “labels” are used to group and categorise deployment objects.
- spec - The desired state and characteristics that we want the object to have. “replicas” is the number of pods we want to be running constantly for this deployment.
- selector - This defines the labels to match the pods which the deployment has to manage.
- image - This is our Docker Hub image that we want Kubernetes to deploy.
Creating Our Kubernetes Deployment
Now to create our deployment. We are still in the root folder of our context at this stage.

C# ASP.Net MVC Core, Docker, Kubernetes (K8s)
Checking Our Kubernetes Deployment
A quick check to see if our deployment is live.

C# ASP.Net MVC Core, Docker, Kubernetes (K8s)
Checking Our Kubernetes Pods and Services
We deployed three pods…

C# ASP.Net MVC Core, Docker, Kubernetes (K8s)
…within a single service.

C# ASP.Net MVC Core, Docker, Kubernetes (K8s)
Reviewing Our Deployment In The Dashboard
Head over to your local Kubernetes dashboard and we can review the live deployment there.

C# ASP.Net MVC Core, Docker, Kubernetes (K8s)
Our pods are also live as per the command line result…

C# ASP.Net MVC Core, Docker, Kubernetes (K8s)
As is our service -

C# ASP.Net MVC Core, Docker, Kubernetes (K8s)
Viewing Our Deployment In Browser
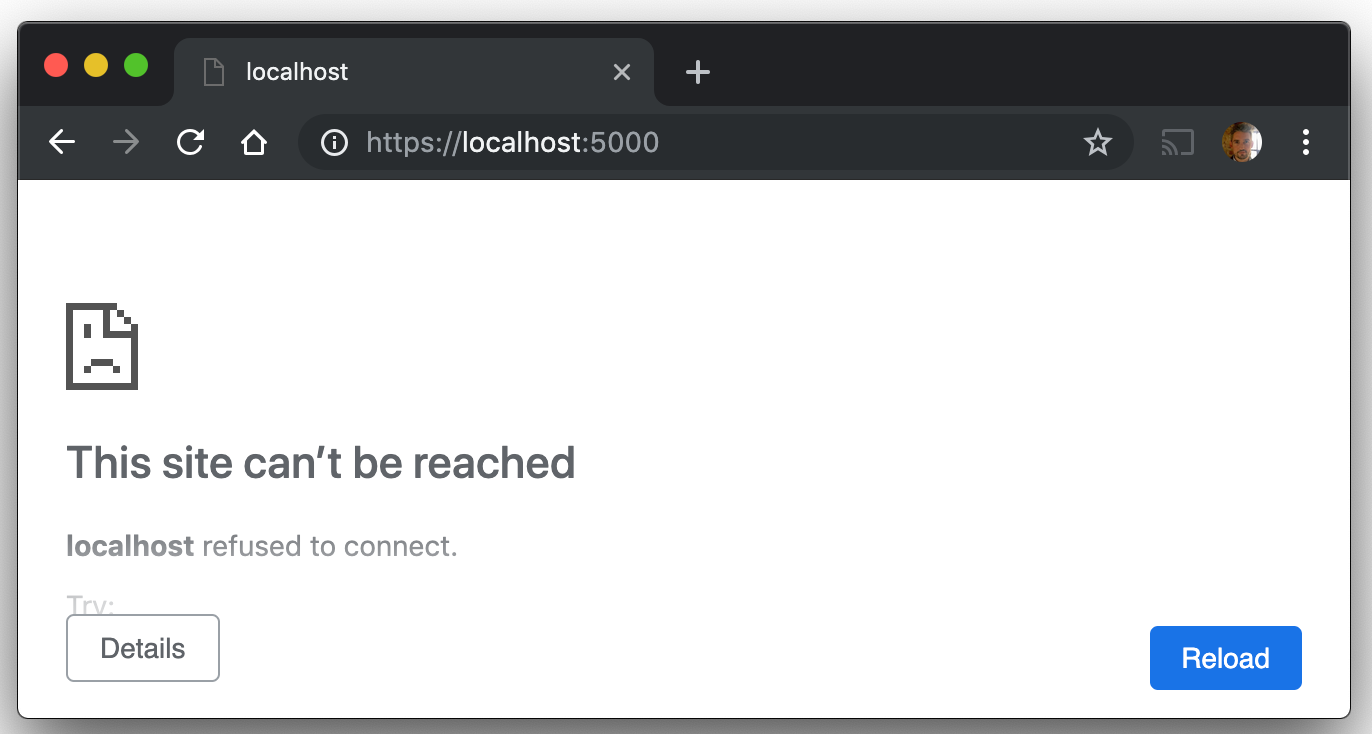
Before we do this, let’s ensure we have no Docker containers running locally.

C# ASP.Net MVC Core, Docker, Kubernetes (K8s)
…and now to check the browser at https://localhost:5000
C# ASP.Net MVC Core, Docker, Kubernetes (K8s)
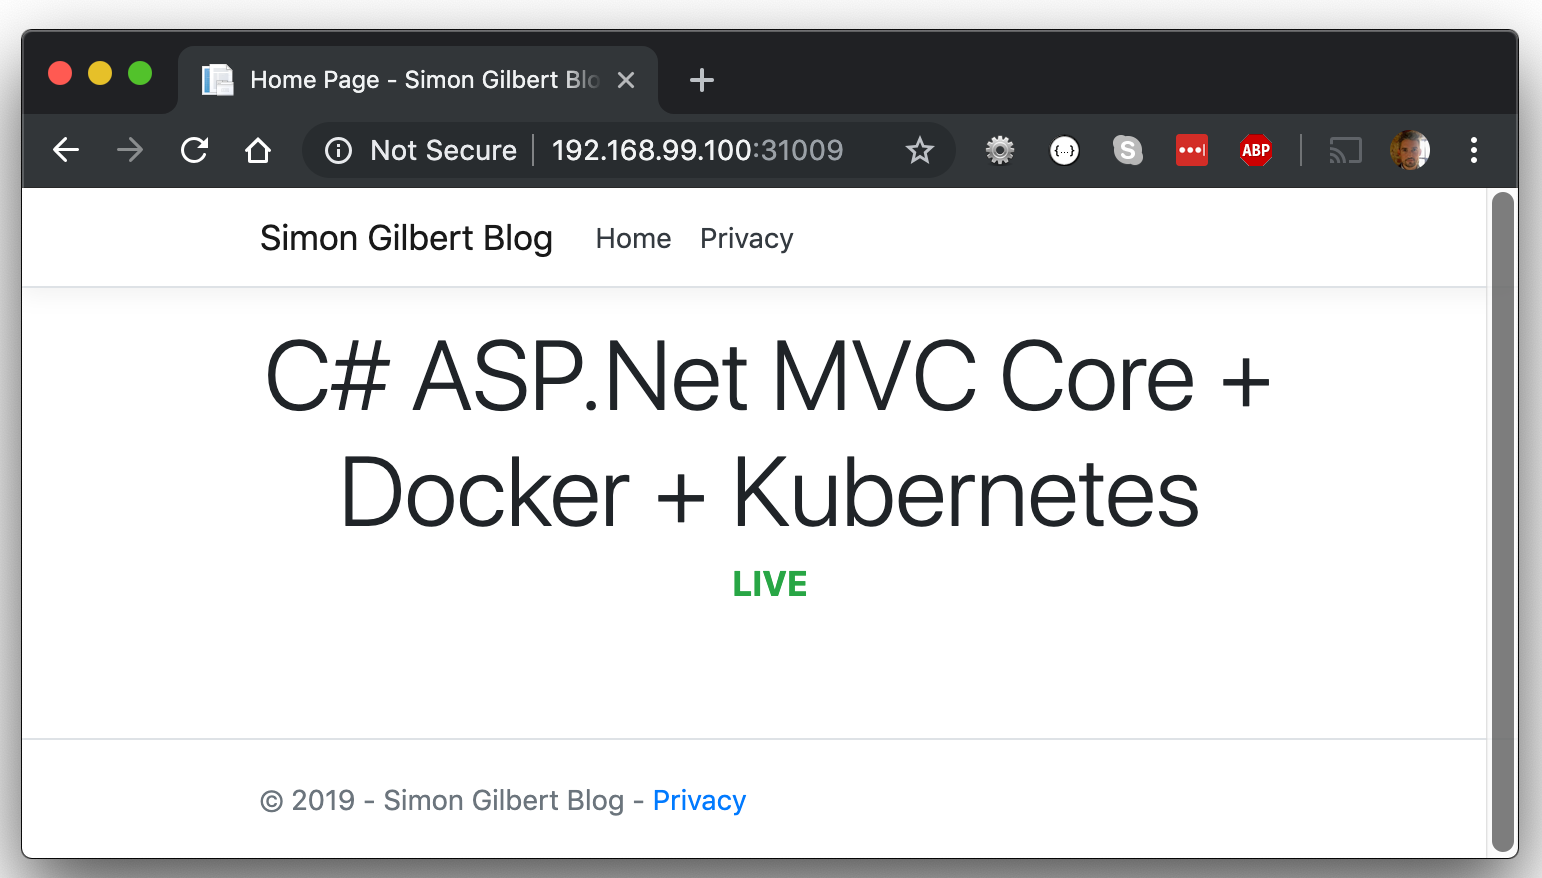
Great, lets run the Minikube command to find the internal URL for our Kubernetes deployment.

C# ASP.Net MVC Core, Docker, Kubernetes (K8s)
…and now to check that URL in the browser.
C# ASP.Net MVC Core, Docker, Kubernetes (K8s)
Excellent, our Docker container is now deployed locally via Kubernetes!
Testing Kubernetes Failover
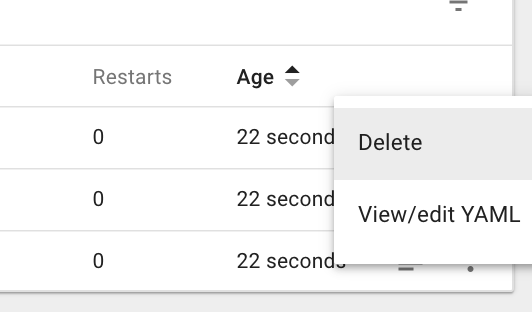
Kubernetes is designed to aid us when it comes to having zero downtime, so let’s test a basic example of this. Head to your local Kubernetes dashboard and delete a pod.
C# ASP.Net MVC Core, Docker, Kubernetes (K8s)
You’ll see the warning message, checking that you want to do this.

C# ASP.Net MVC Core, Docker, Kubernetes (K8s)
Review the workload status, which indicates that a pod has died.

C# ASP.Net MVC Core, Docker, Kubernetes (K8s)
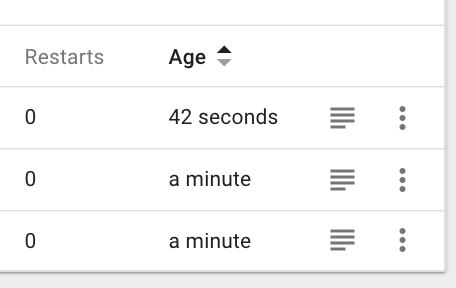
Kubernetes immediately begins creating a pod.

C# ASP.Net MVC Core, Docker, Kubernetes (K8s)
Note how quickly the Kubernetes pod comes back up!
C# ASP.Net MVC Core, Docker, Kubernetes (K8s)
…Pretty good isn’t it?
As a final note, you should always use kubectl apply (not kubectl create), if you have already deployed but make changes to the deployment.yaml file which need re-executing.
Enjoy!