[Full Stack Web] Client-Side Validation Postback - ReactJS + Redux + C# ASP.Net Core
![[Full Stack Web] Client-Side Validation Postback - ReactJS + Redux + C# ASP.Net Core](/images/2019/06/simon-gilbert-dev-cto-blog-28.png)
Early Validation
When it comes to users entering data, it’s important to always validate the integrity before storing the information. The earlier you can do that the better, so why validate server-side when you can validate client-side before submitting the postback?
Prerequisites
You’ll need to follow the steps I blogged about here to configure your single page app (SPA) setup to run with ReactJS + Redux + C# ASP.Net Core.
Let’s Code….
Assuming you’ve setup your local repository as per the aforementioned blog, the first thing to code is a component to hold our dynamic label. Everything in this example will be based on Bootstrap 4. Validation icons are cool, so let’s add one of those which can be dynamically change as and when necessary.

Client-Side Validation Postback - ReactJS + Redux + C# ASP.Net Core
Next is the label component itself, which will need to import our validation icon to be used as and when necessary.
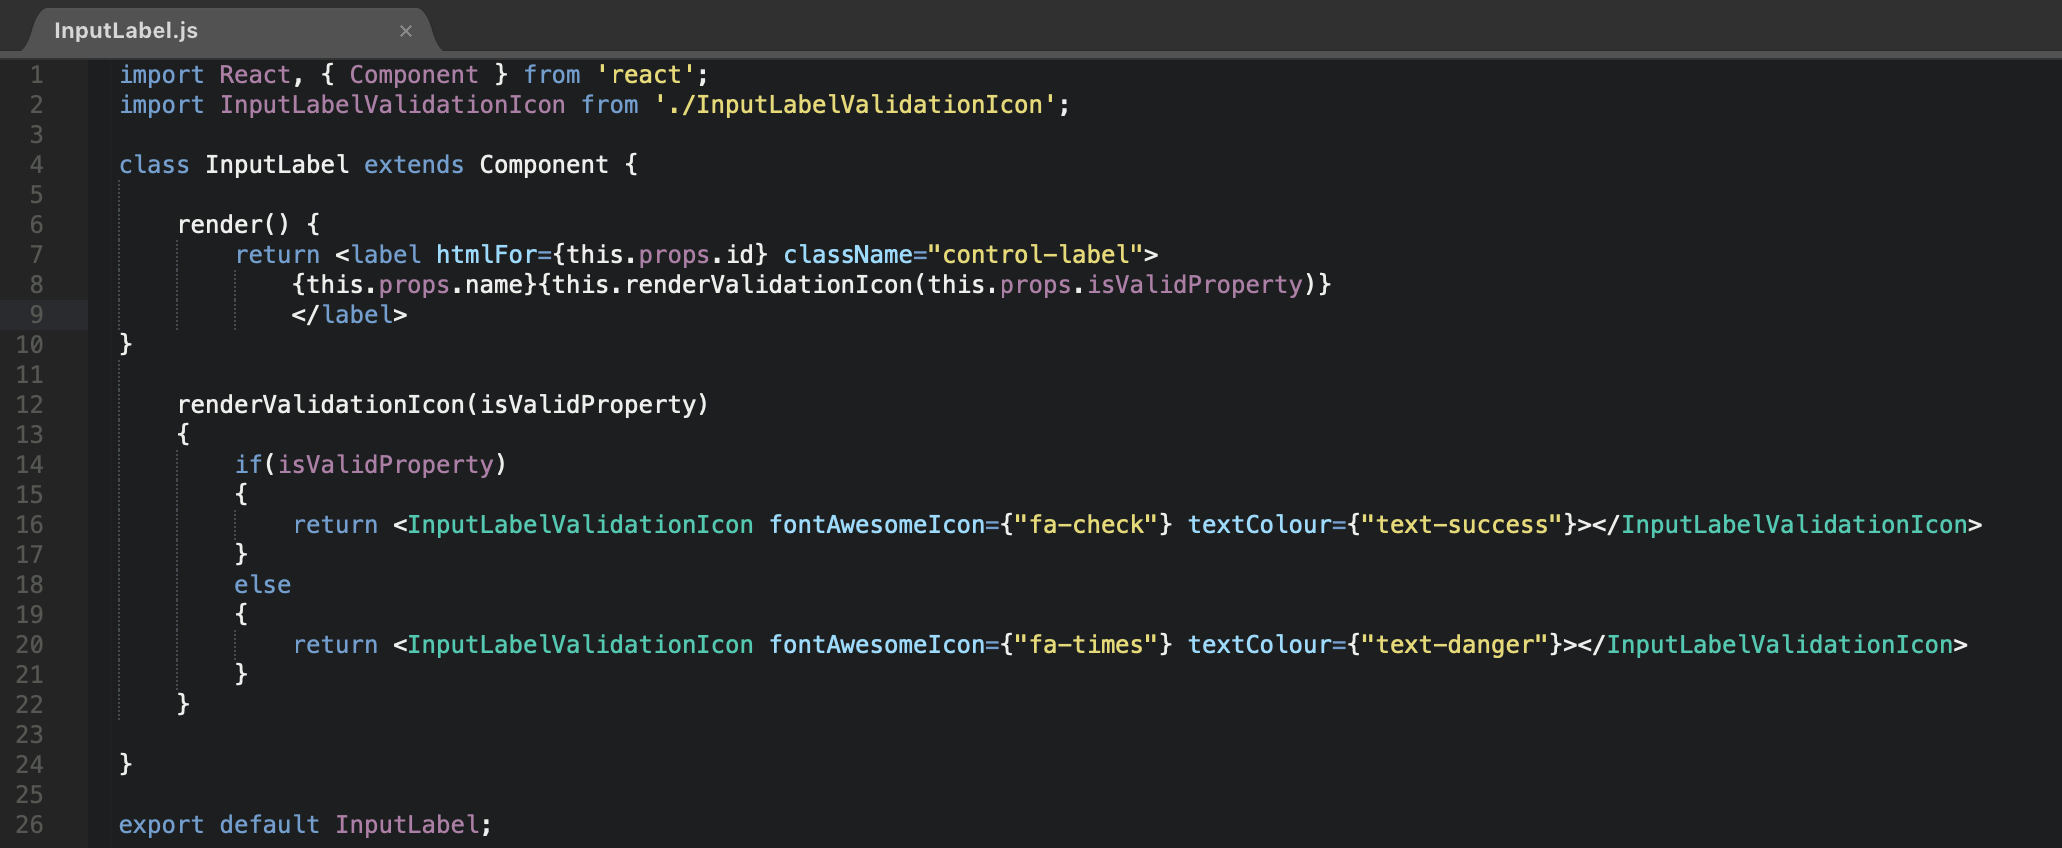
Client-Side Validation Postback - ReactJS + Redux + C# ASP.Net Core
Now that our label component is coded, let’s add a further component to hold our validation error messages.
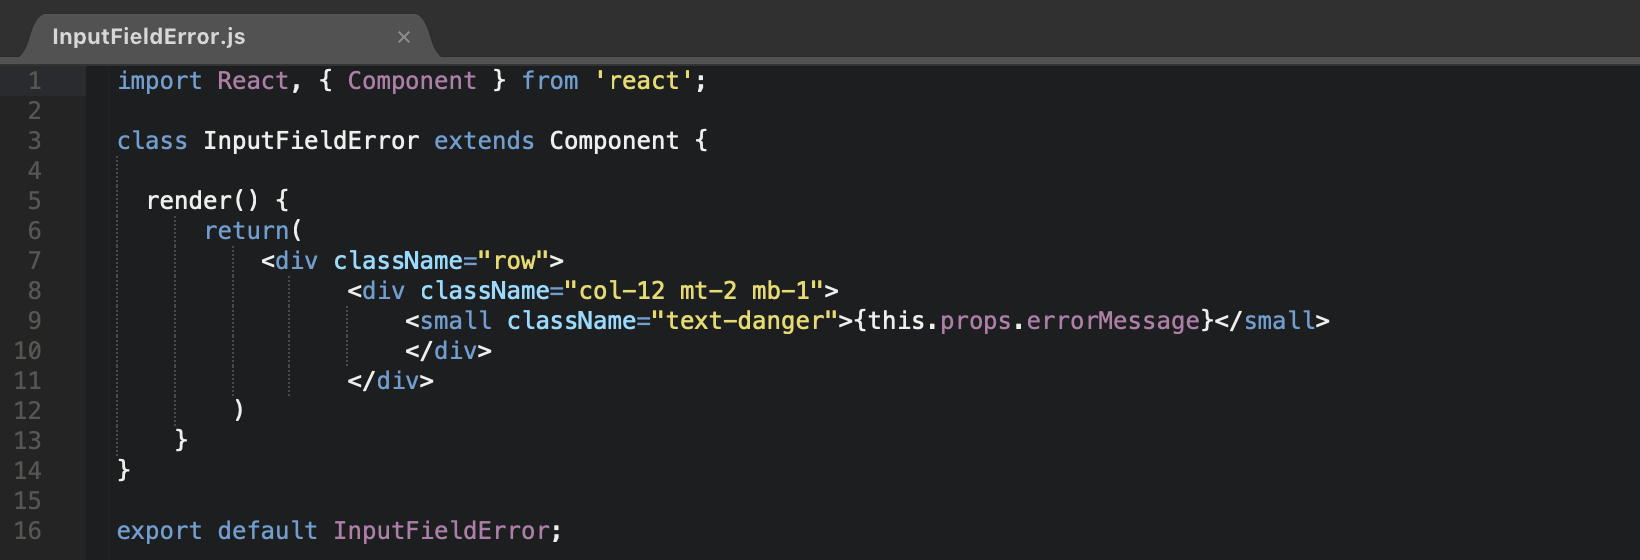
Client-Side Validation Postback - ReactJS + Redux + C# ASP.Net Core
Next we need to construct an input field component which imports our label and field error components.
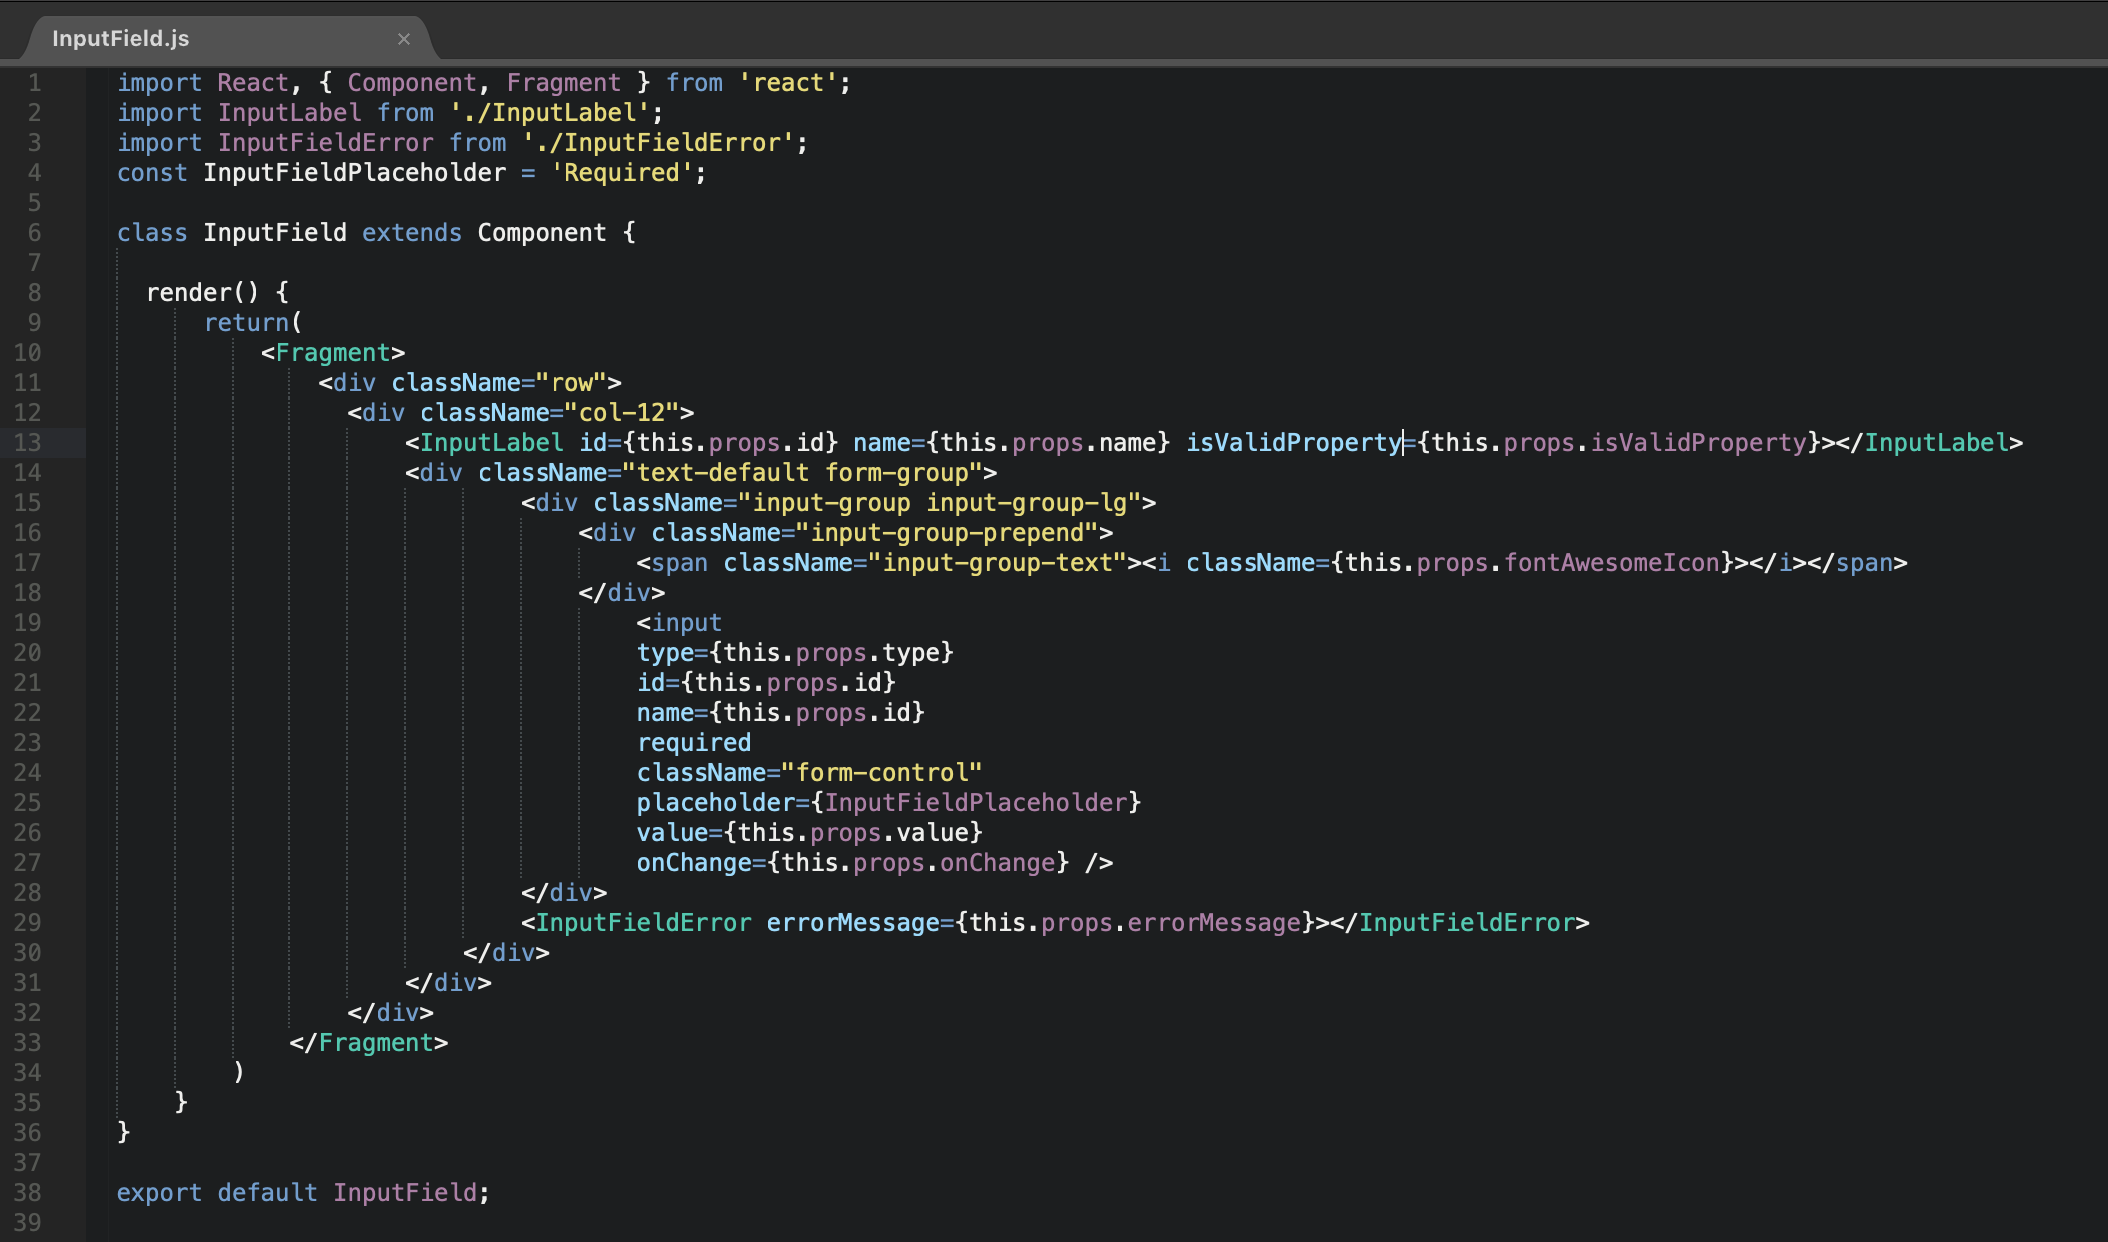
Client-Side Validation Postback - ReactJS + Redux + C# ASP.Net Core
Now that our input field component is constructed, we need a button component which will remain disabled until all input components are valid.
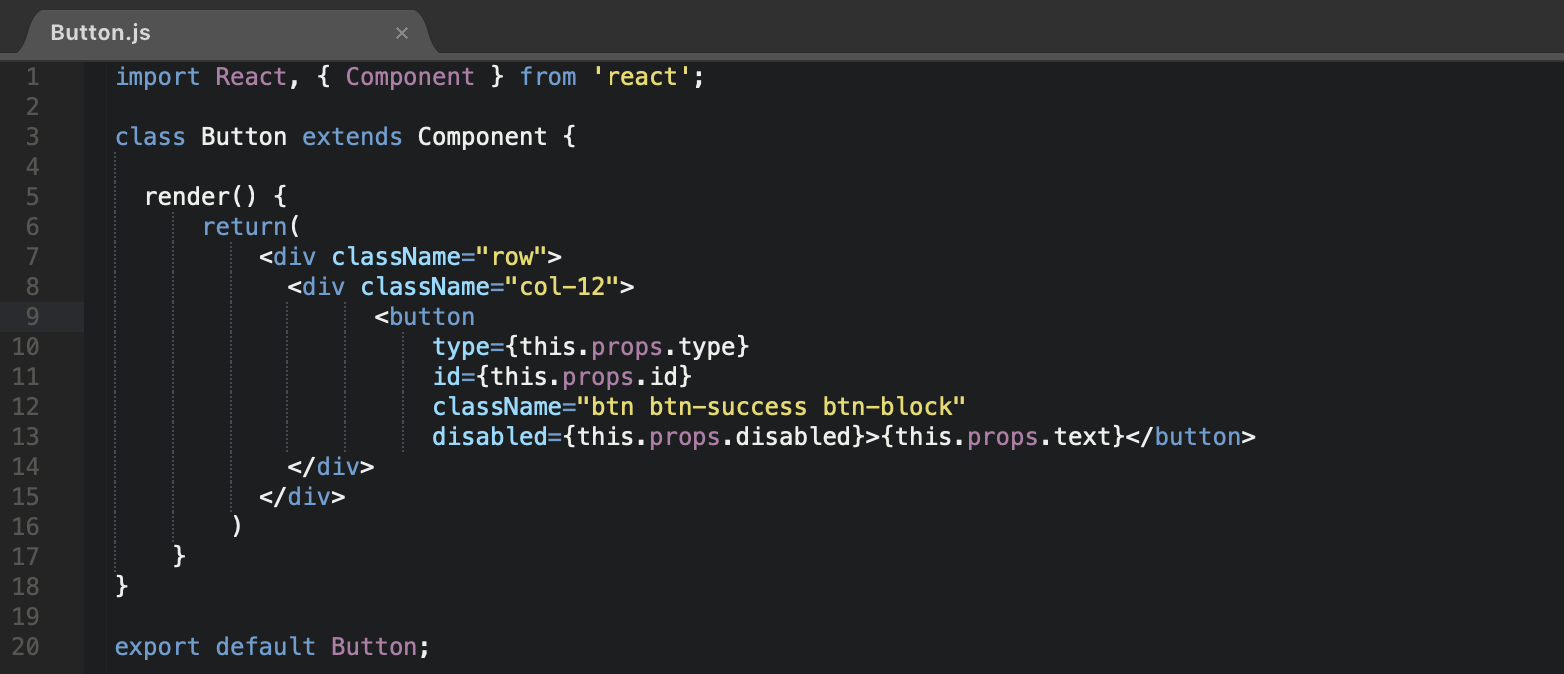
Client-Side Validation Postback - ReactJS + Redux + C# ASP.Net Core
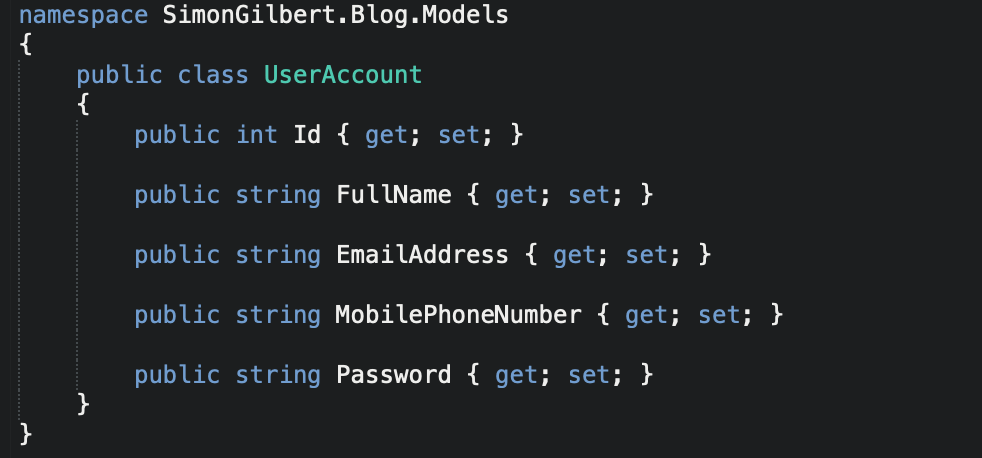
We now need a data model for our server-side code, written in C# .Net Core.
Client-Side Validation Postback - ReactJS + Redux + C# ASP.Net Core
Next, some more server-side code (our api controller and a static list to store the data in C# ASP.Net Core).

Client-Side Validation Postback - ReactJS + Redux + C# ASP.Net Core
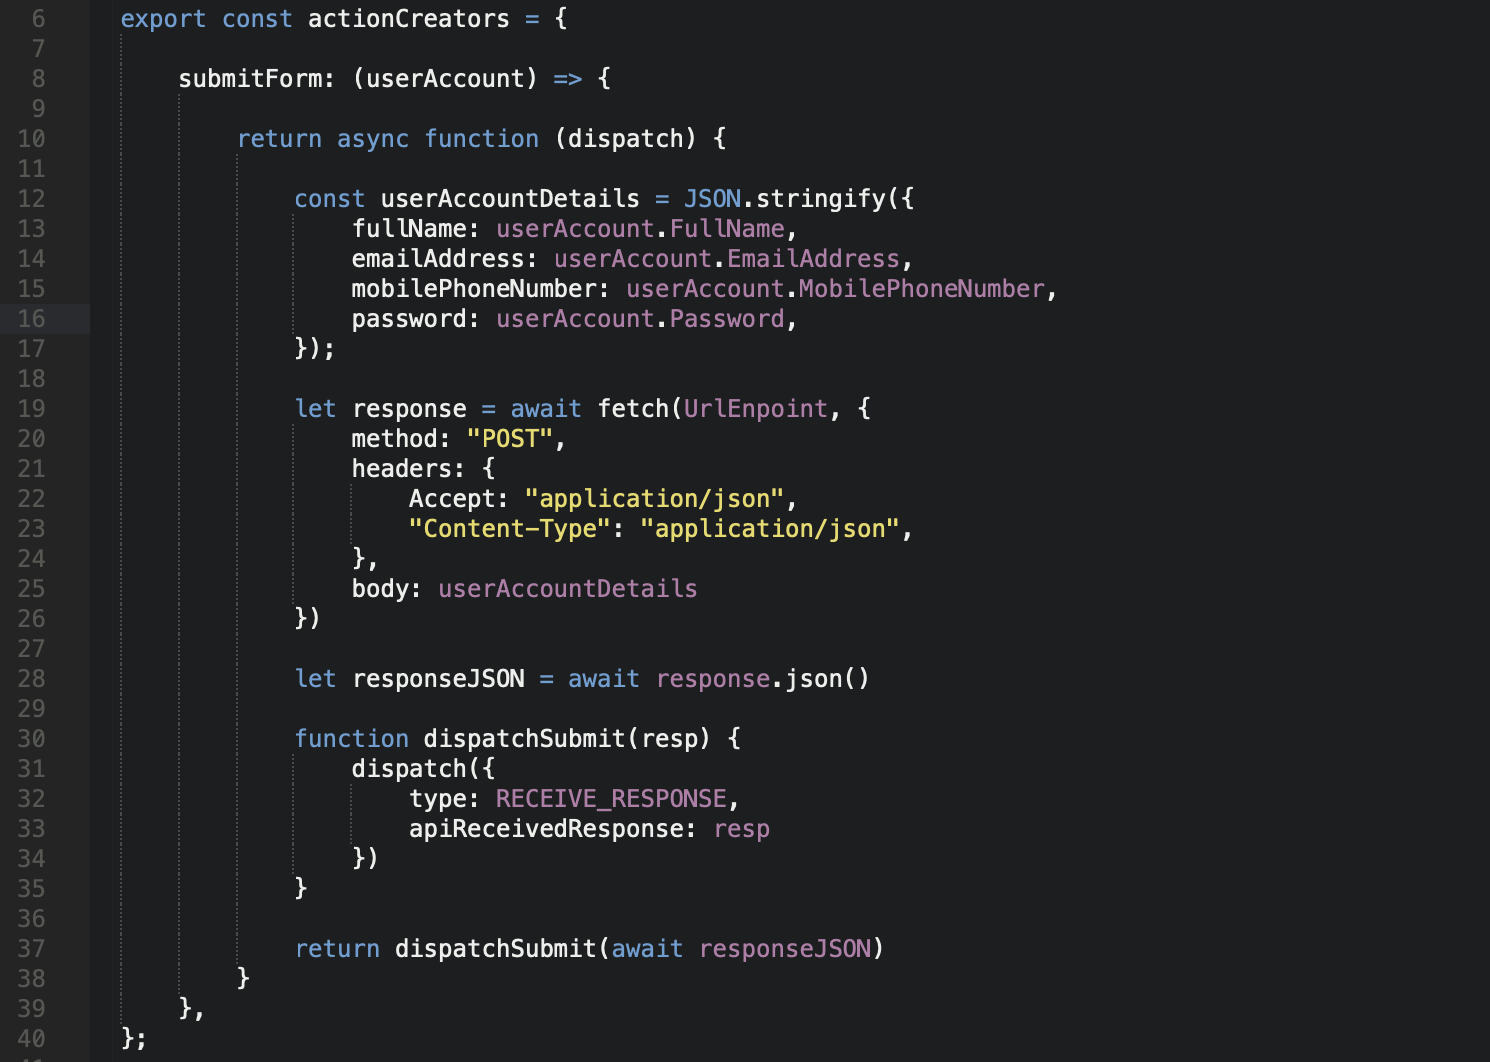
Now for the part where Redux comes in to facilitate our connection between the client-side and the server-side. We’ll expose a “submitForm” function within our action creators, to dispatch and receive our request and response.
Client-Side Validation Postback - ReactJS + Redux + C# ASP.Net Core
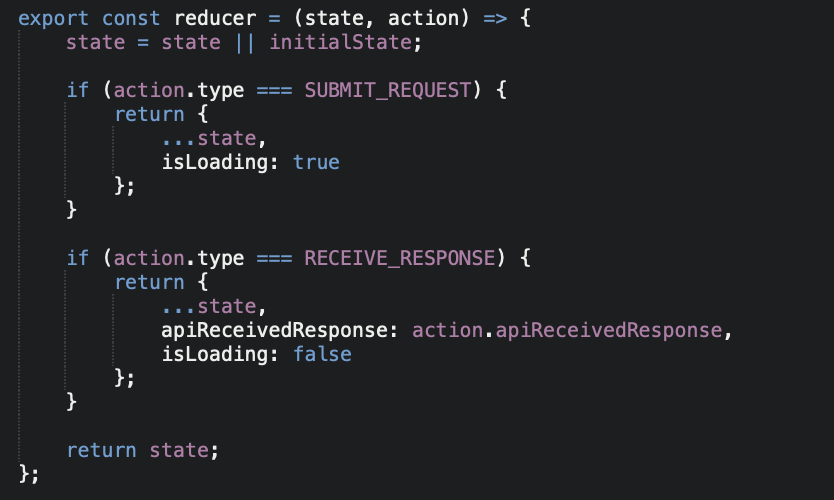
…accompanied by some simple reducer statements.
Client-Side Validation Postback - ReactJS + Redux + C# ASP.Net Core
Next we need to code the client-side validation, starting with some constants in our SignUpForm component -

Client-Side Validation Postback - ReactJS + Redux + C# ASP.Net Core
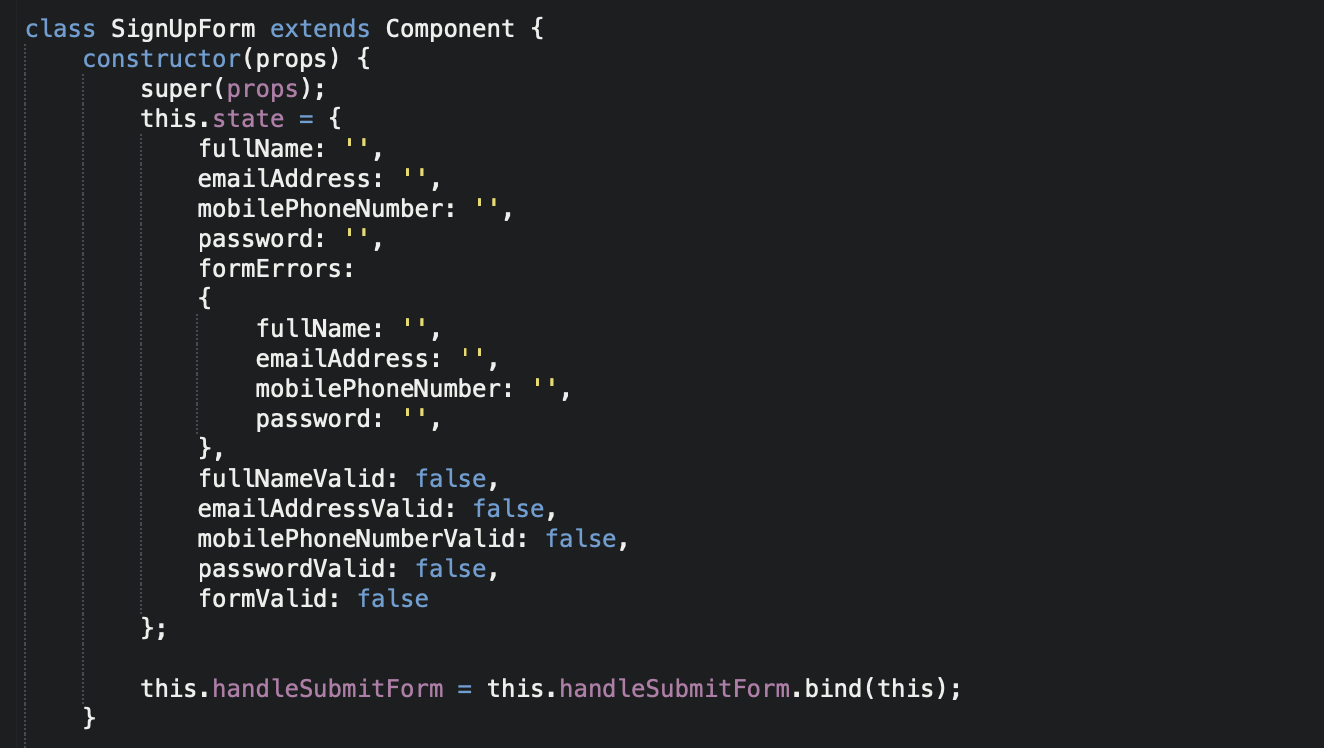
Following this, we’ll need a constructor and some properties to manipulate when the user interacts with the form.
Client-Side Validation Postback - ReactJS + Redux + C# ASP.Net Core
Now we can render our form component, using the input field component we coded at the beginning.
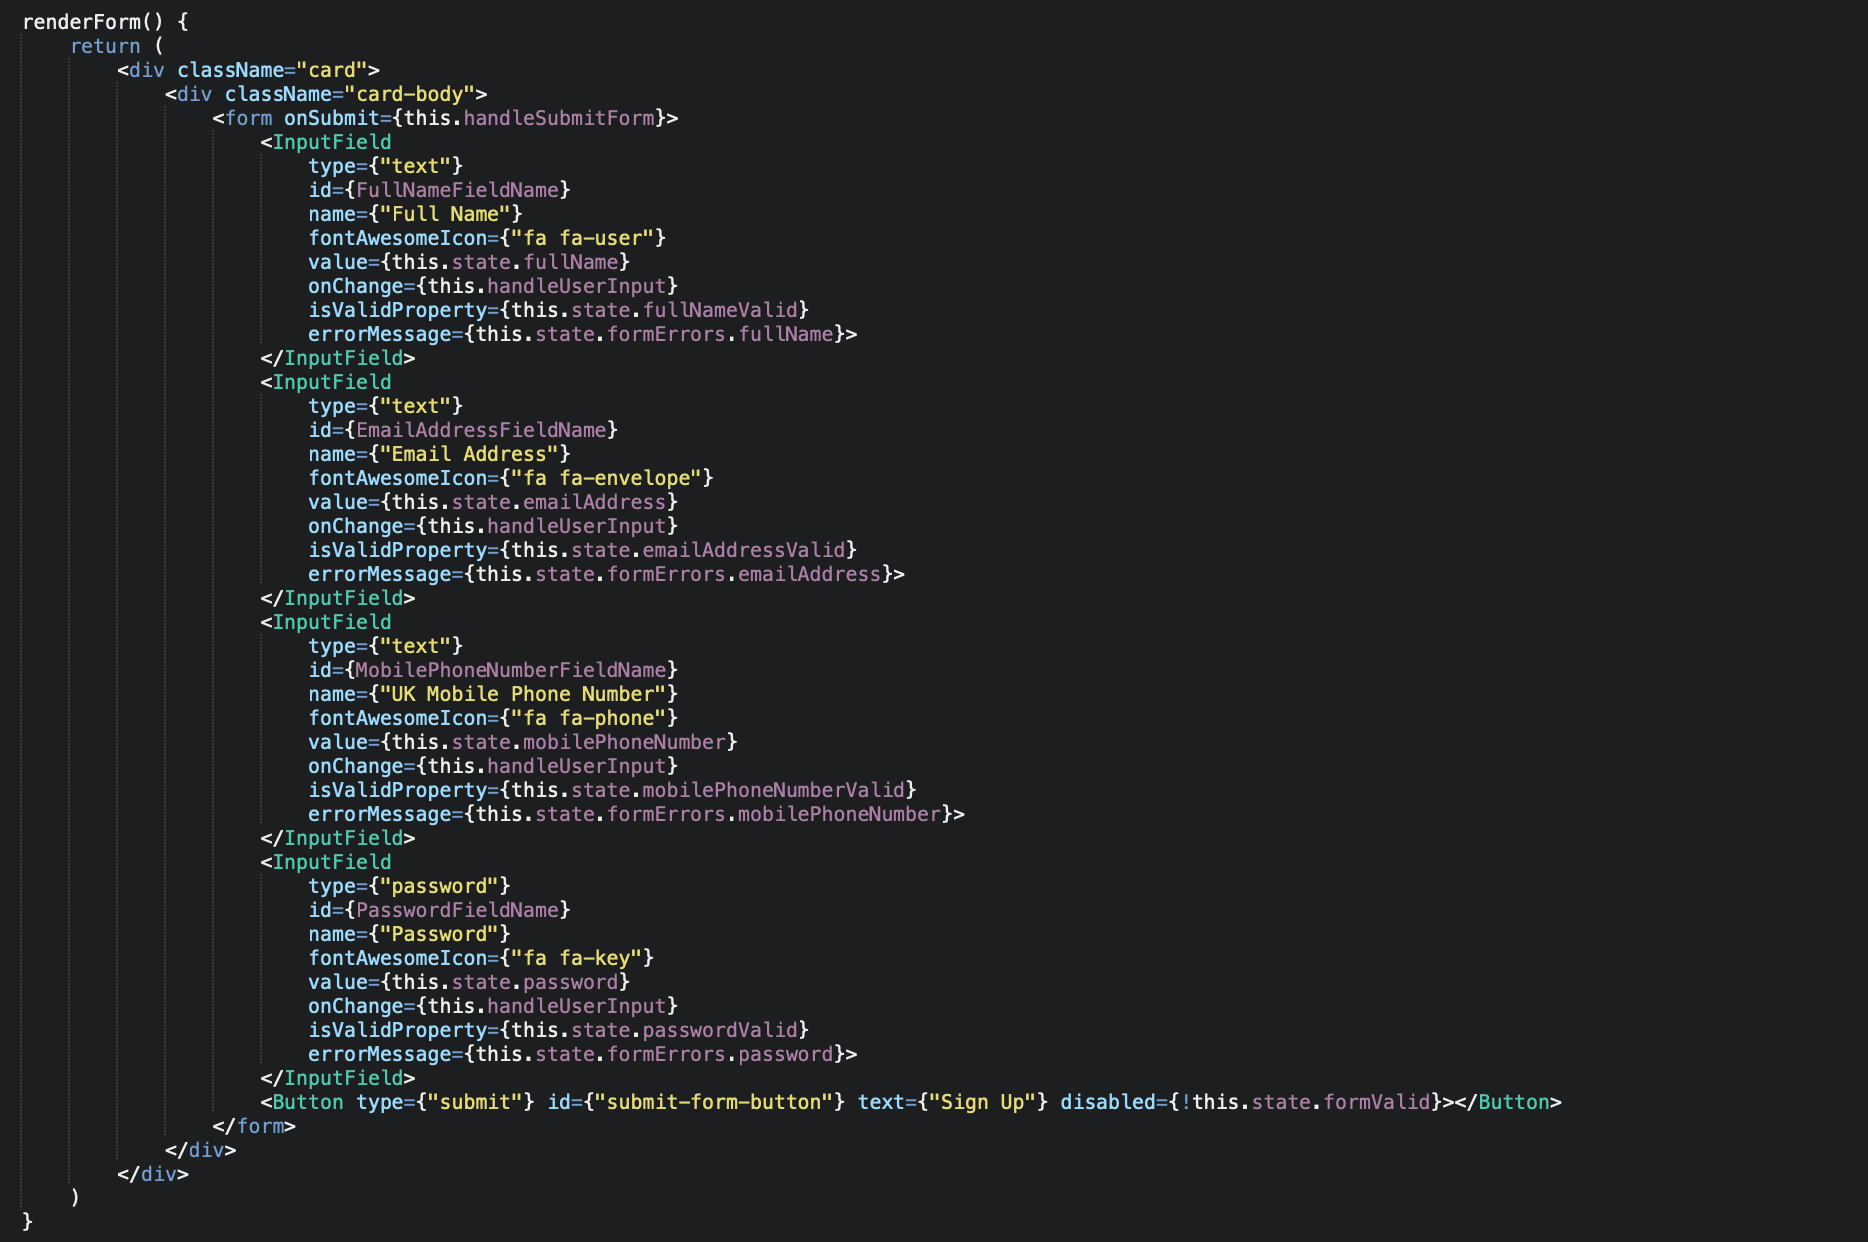
Client-Side Validation Postback - ReactJS + Redux + C# ASP.Net Core
You’ll note that each input field has a function attached to its onChange method, specifically for handling user input -

Client-Side Validation Postback - ReactJS + Redux + C# ASP.Net Core
Now to validate the inputs with a glorious switch statement, depending on the field name.
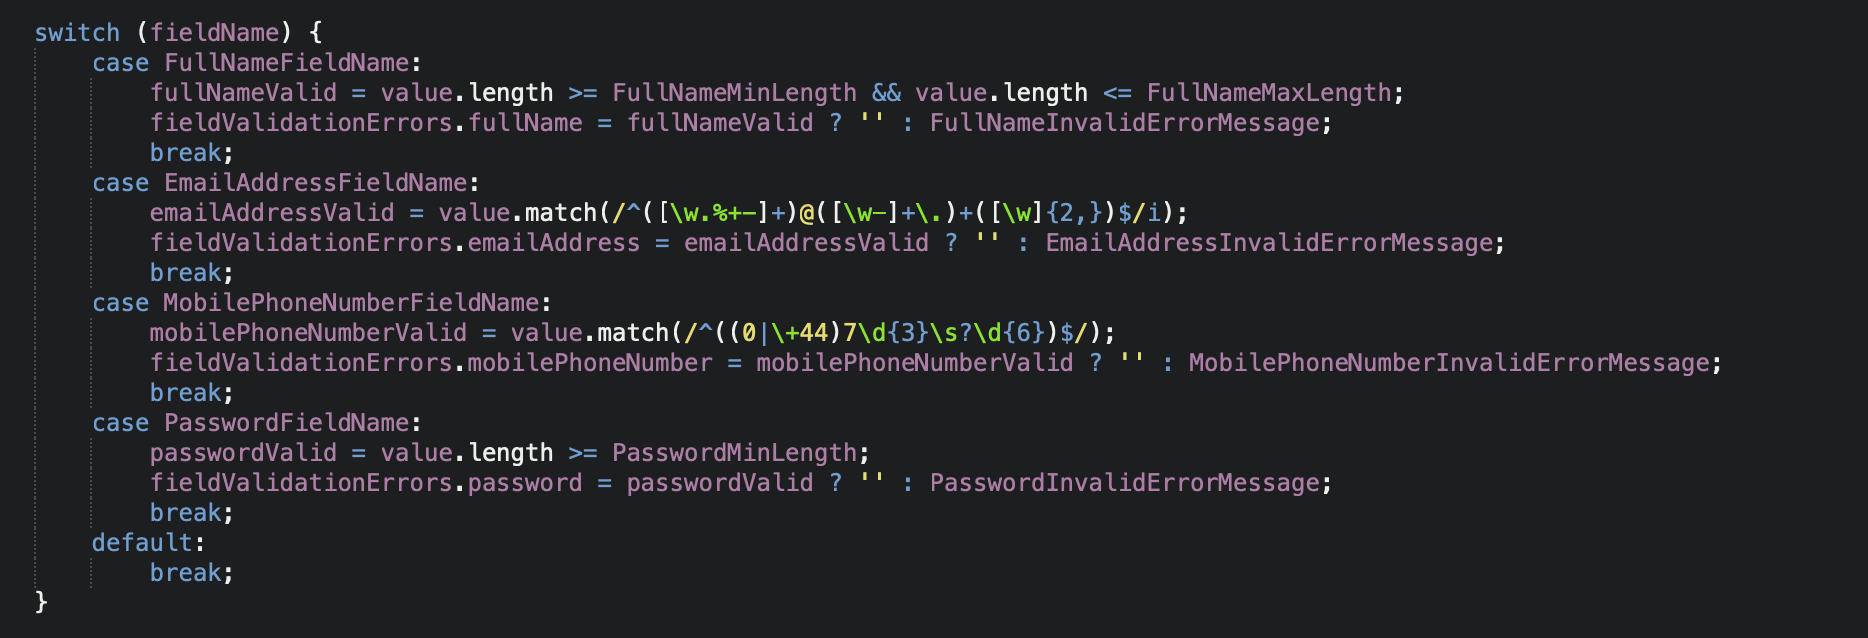
Client-Side Validation Postback - ReactJS + Redux + C# ASP.Net Core
Let’s run our build and see what we’ve got -
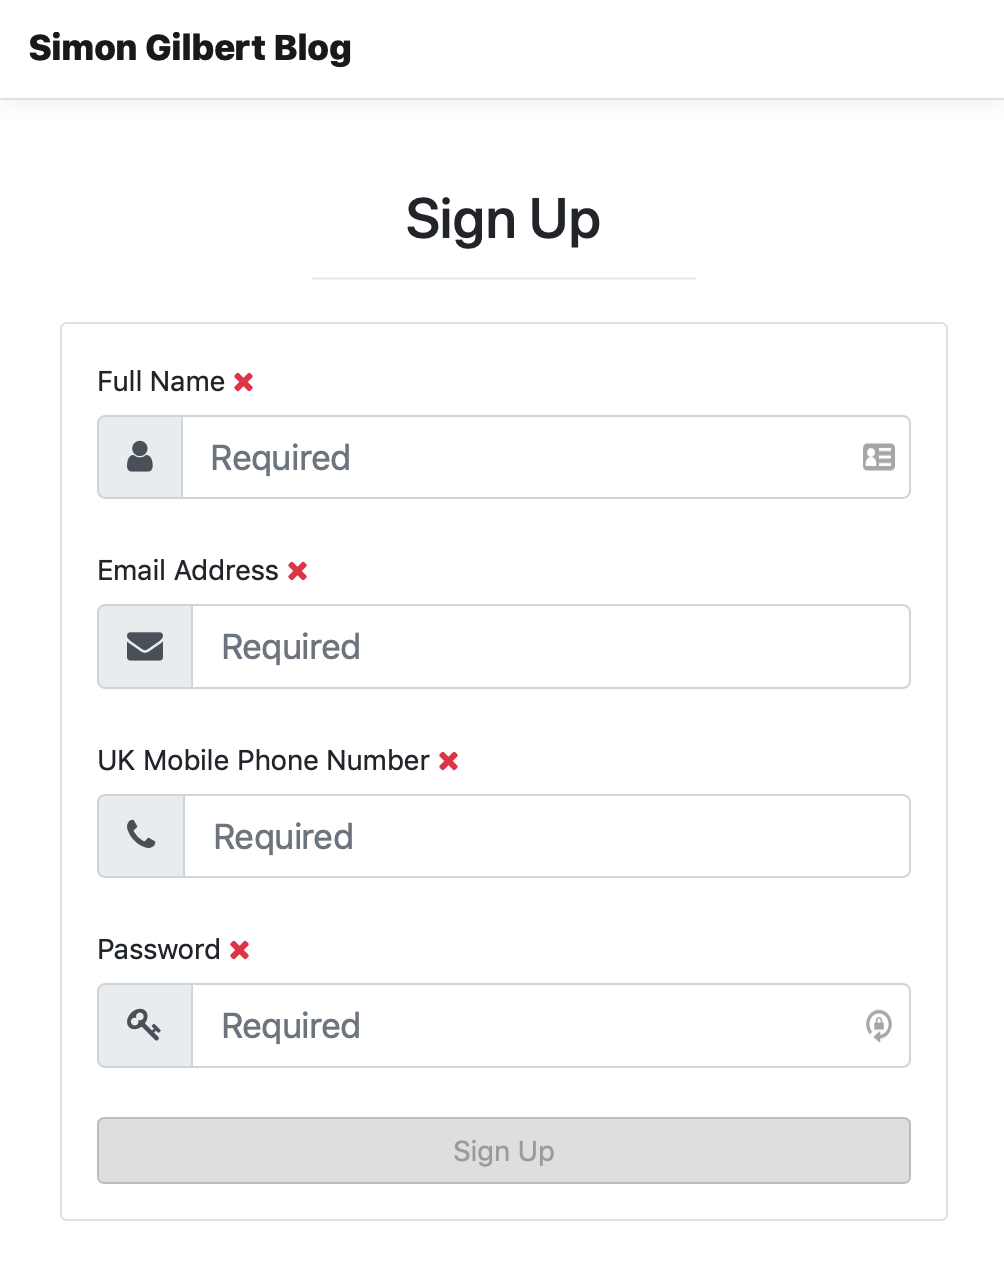
Client-Side Validation Postback - ReactJS + Redux + C# ASP.Net Core
…and to test the validation as we type in our name -

Client-Side Validation Postback - ReactJS + Redux + C# ASP.Net Core
Followed by our email address, which validates differently based on our switch statement.

Client-Side Validation Postback - ReactJS + Redux + C# ASP.Net Core
Here we can clearly see the valid fields vs. the invalid fields -
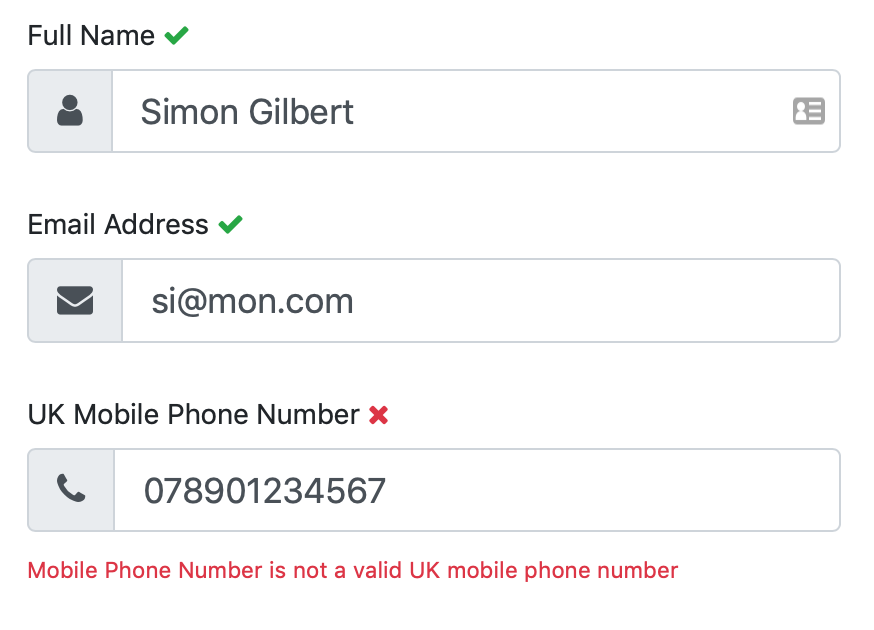
Client-Side Validation Postback - ReactJS + Redux + C# ASP.Net Core
Eventually our end result enables our form submission button -

Client-Side Validation Postback - ReactJS + Redux + C# ASP.Net Core
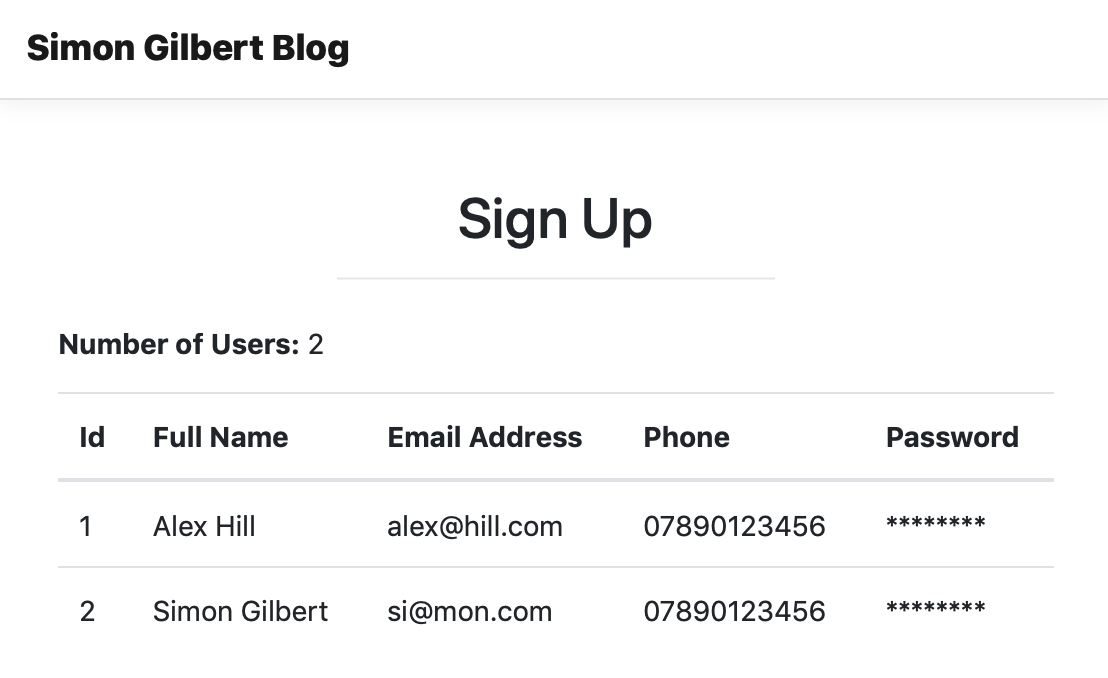
Clicking submit now shows us our received response from our C# ASP.Net Core api.
Client-Side Validation Postback - ReactJS + Redux + C# ASP.Net Core
Enjoy!